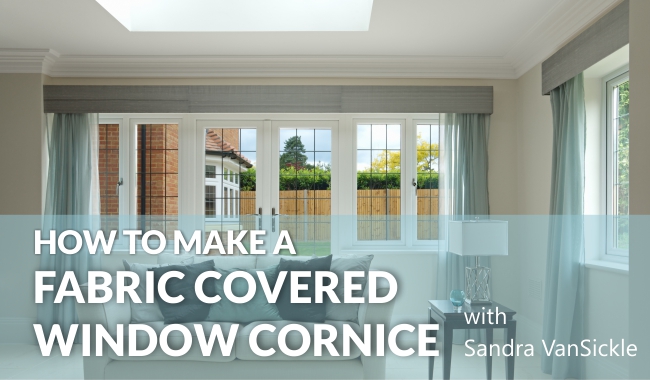
In this Custom Cornice Board lesson, I will teach the techniques to build and fabricate two styles of custom cornice boards, Flat Bottom-banded, and the more advanced Step-down cornice.
How to Make a Fabric Covered Window Cornice
$39.99
Description
What You Get
Class Overview
In this Custom Cornice Board video, I will teach the techniques that I use to build and fabricate two different styles of custom cornice boards.
We will begin by exploring fabric options, then move into how to accurately measure your window to determine the dimensions of your cornice and estimate fabric yardage.
Next, we will visit the workshop to select and cut the wood for the frame. Once this is done, using the proper tools and techniques, we will assemble the frame, making it ready to add the fabric.
Back in the workroom, we will begin planning, cutting, and stitching our fabric. Once the fabric has been cut and sewn, we will begin adding the layers to the frame.
Detailed instructions will be shown on how to pattern-match and join widths of fabric, how to make and join cording to back facing, and the bottom band.
Before sealing the back of the cornice with blackout lining, I will walk you through the steps on how to customize your cornice by adding the detail of a coordinating bottom band encased by cording.
Throughout the video, you will be given close-up views on how to conquer the corners, reduce bulk, and the fine details of finishing the edge of the legs and cording. Plus, you will learn the importance of adding cardboard tack strip to achieve a smooth clean edge.
The techniques taught in this video can be applied to any cornice.
The dimensions of the banded bottom cornice in this video have a Face width of 36” wide by 12” vertically, and a projection of 4”. The step-down cornice has a face width of 30” wide, short point of 13”, long point 16” and 4” projection.
In this video you will learn to:
- Explore fabric options
- Measure and determine fabric yardage
- Select and cut the wood frame
- Cut and stitch fabric
- Pattern match and join cording
- Advanced details for the step-down cornice.
- Use techniques that can be applied to any cornice
Run Time: Approximately 4 hours
Class Lesson Breakdown
- Part 1 – Choosing Fabric and Measuring
- Part 2 – Building the Frame
- Part 3 – Fabric Cuts
- Part 4 – Adding Fabric to Board
- Part 5 – Making Cord and Assembling Bottom Band
- Part 6 – Finishing Bottom Banding
- Part 7 – Finishing Top
- Part 8 – Lining the Back
- Part 9 – Final Note
Materials
- Fabric Marker
- Fabric Glue
- Blackout Lining (or lining)
- ¾ oz Polyester Dacron
- 8/32” cotton cord
- Face Fabric of your choice
- Banding Fabric of your choice
- 3/8” Plywood for Face of Cornice
- ¾” Plywood for Legs and Dust Cover of Cornice (can use 1 x 4)
- ¾” Staples
- 1” Finishing Nails (can use wood screws)
- 3/8” cardboard Tack Strip
Tools
- Sewing Machine
- 1/4” Cording Foot for Sewing Machine
- Pneumatic Staple Gun
- Pneumatic Nailer
- Air compressor
- Two Prong Stapler Puller
- Needle Nose Pliers
- Metal Tape Measure
- Radial Arm Saw
- Circular Saw with attached Accu-Rip Saw Guide
- Steam Iron
- Seam Ripper
- 6” Ruler
About the Instructor
 Sandra VanSickle is an ardent entrepreneur, continuing education instructor, and lifelong learner, with nearly 40 years of experience in the window fashion industry. A passion for fabric and design led her to abandon the “corporate box” and pursue her dream of business ownership. She is the proud owner of Sew What’s New, a wholesale custom home furnishings workroom, Cuddle-bugs-n-Cocoons, an online, international retail business featuring her blanket and bedding designs, and most recently, NewTech-Style, her online tech presence.
As a life-long learner, Sandra’s newest “passions” are technology and social media. Using her creative skills, she is always looking for new ways to use the latest technology to optimize her business operations to increase her Return On Investment (ROI).
Over the years Sandra has used her knowledge and experience in fabric, design, fabrication, and training to teach Custom Drapery Methods at INSPIRE (National WCAA Conference), and has written Technology articles for the Drapery & Design Magazine.
She is currently a member of the Window Coverings Association of America (WCAA) where she serves as the National Treasurer, the Co-President of the WCAA Virtual Chapter and has served as Treasurer of the local WCAA Triangle Chapter in Raleigh, North Carolina.
With her contagious enthusiasm, along with her strong teaching background, Sandra is now passing along what she’s learned – and learning – through articles and industry speaking engagements.
Taught By
 Sandra VanSickle is an ardent entrepreneur, continuing education instructor, and lifelong learner, with nearly 40 years of experience in the window fashion industry. A passion for fabric and design led her to abandon the “corporate box” and pursue her dream of business ownership. She is the proud owner of Sew What’s New, a wholesale custom home furnishings workroom, Cuddle-bugs-n-Cocoons, an online, international retail business featuring her blanket and bedding designs, and most recently, NewTech-Style, her online tech presence. Read More…
Skill Level
Beginner
How it Works
Once you purchase find your class in your classes list.
Instant and unlimited access.
Watch on any device anytime.
1-year unlimited access.
Only logged in customers who have purchased this product may leave a review.


Reviews
There are no reviews yet.